Guide to Using the Creator Dashboard
This guide explains the key sections of the creator dashboard, helping you manage your products, track sales, and optimize your seller profile. Each section includes a specific URL and details on its functionality.
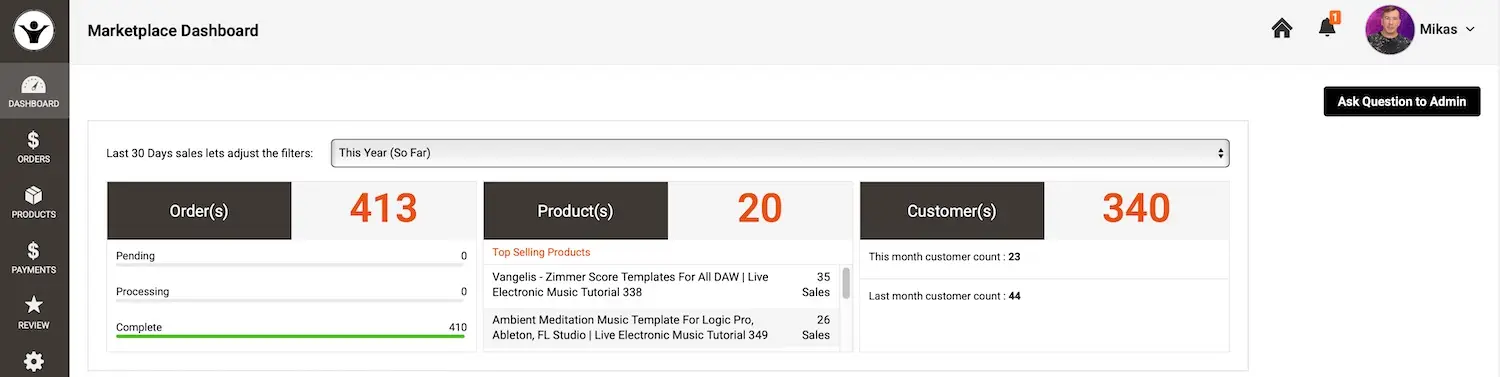
Main Dashboard Page
- Purpose: This is your starting point to monitor sales activity.
- Features:
- View yourlatest sales.
- Setfilters to analyze statistics about your product sales (e.g., by time period or product).
- Check yourlifetime sales total.
- See a list of yourlatest orders.
-
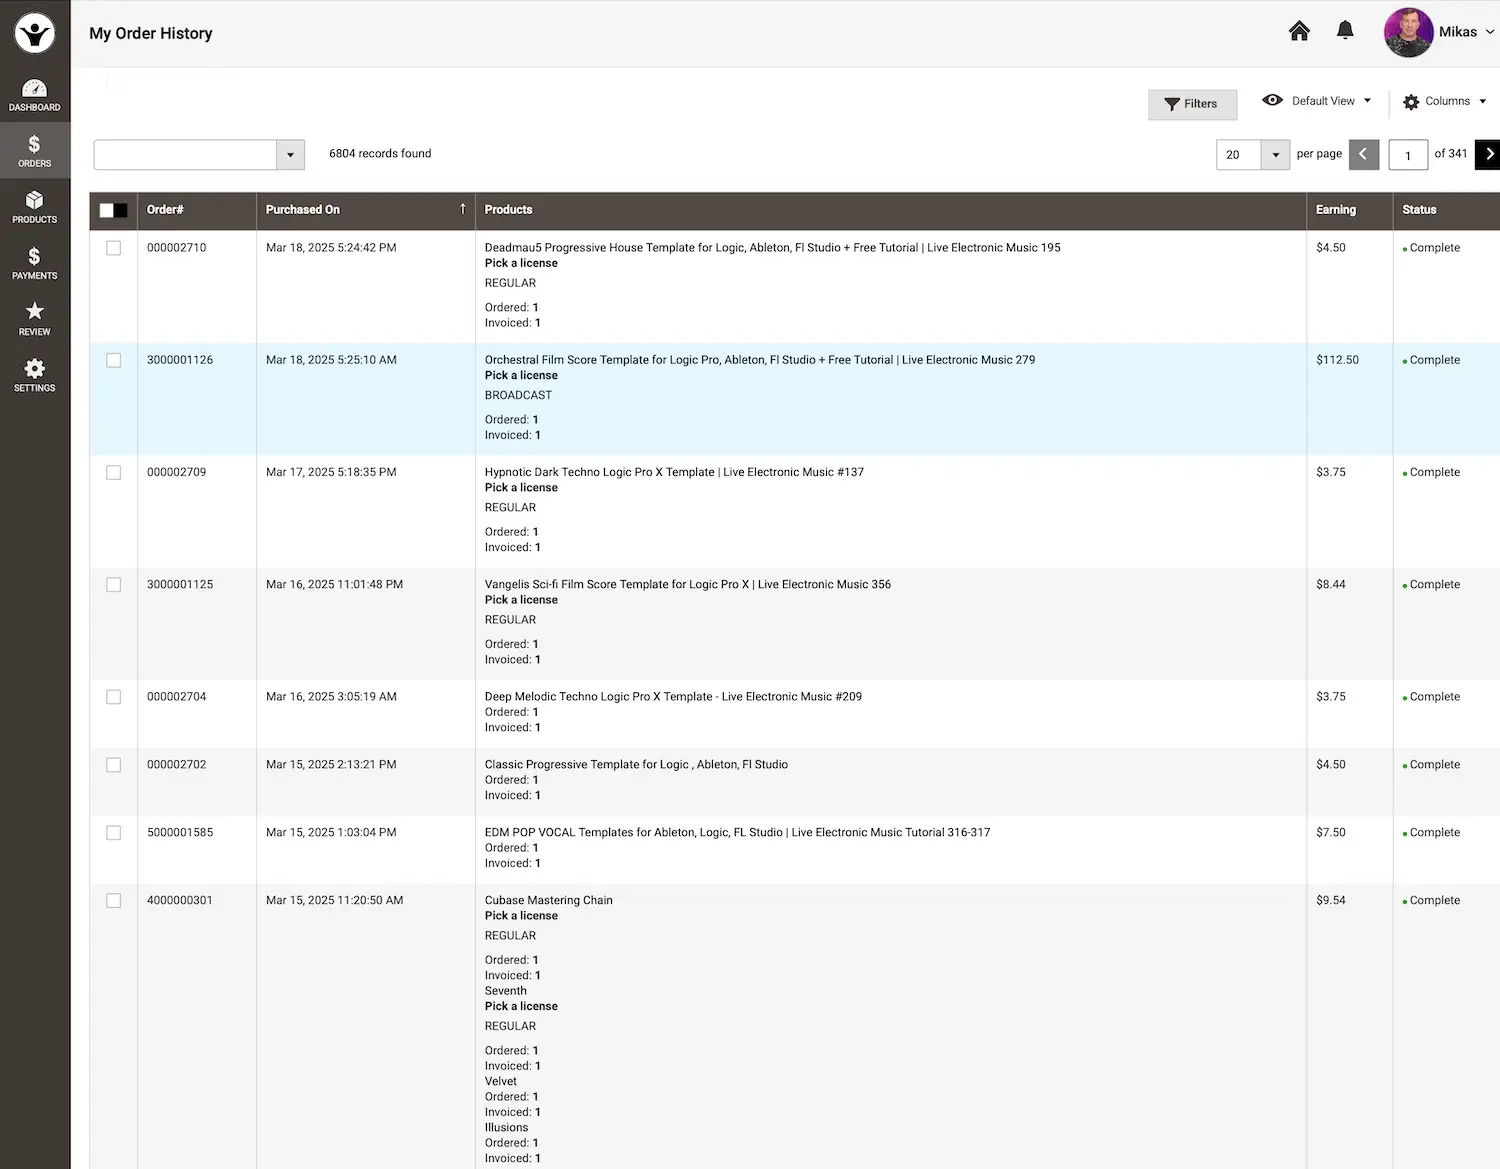
Orders Page
- Purpose: Provides detailed insights into all your sales.
- Features:
- Sales are organized byinvoices. A single invoice may include multiple items if sold in one transaction.
- Amounts displayed are yourfinal earnings after all rebates and fees are deducted.
-
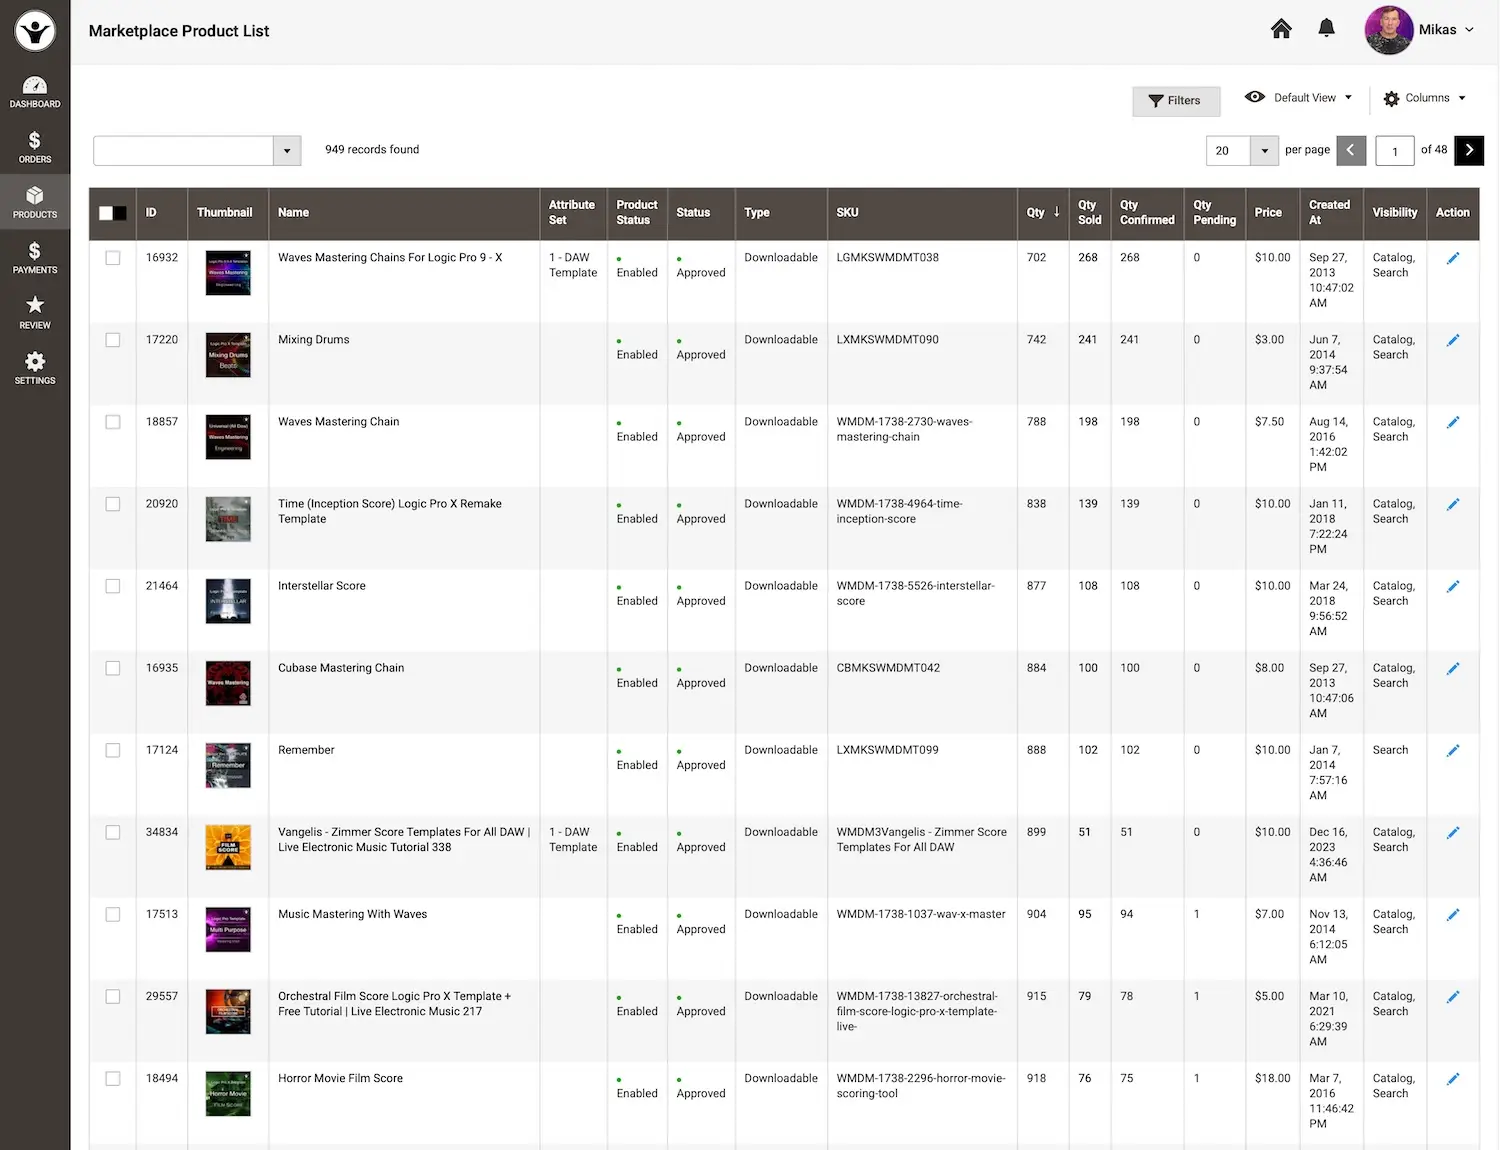
My Products
- Purpose: Manage and review all your products listed for sale.
- Details Displayed:
- Product Name: The title of your product.
- Current Availability: Whether the product is in stock or sold out.
- Amount Sold: Total units sold.
- Current Sale Price: The price customers pay.
- Date Added: When the product was listed.
-
Editing Products
- How to Edit:
- Locate theAction button (with a pen icon) on the right side of each product.
- Edit any product field, including:
- Product description.
- Files (e.g., updated versions).
- Demos or previews.
- Cover art.
-
- Use this feature to fix mistakes or refresh outdated content.
-
- Important Notes:
- You can assign up to3 genre categories per product.
- Donot add products to "ON SALE" or non-genre categories.
- Always clickSave after making changes to ensure updates are applied.
-
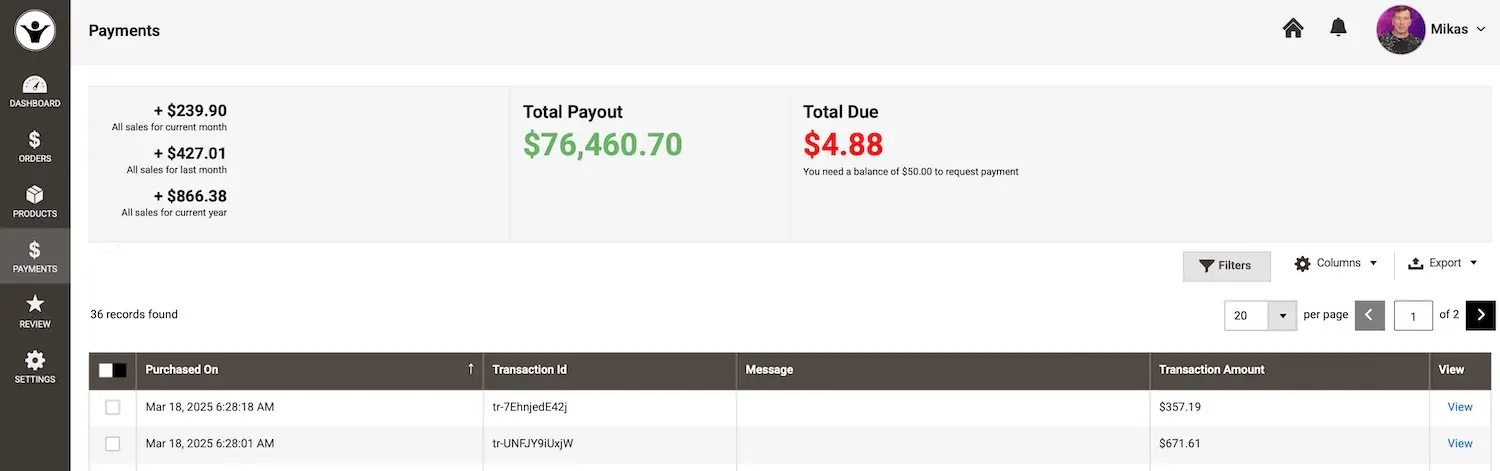
Payments Page
- Purpose: Track your earnings and request payouts.
- Requirements: A minimum balance of$50 is needed to request a payment.
- Features:
- Lifetime Earnings: Total earnings across all time.
- Amount Due: Funds available for payout.
- Sales Breakdown:
- Current month’s sales.
- Last month’s sales.
- Total sales for the current year.
-
- Payout Details:
- View yourlast payout.
- Click it to see a breakdown, including products sold and amounts earned per transaction.
-
-
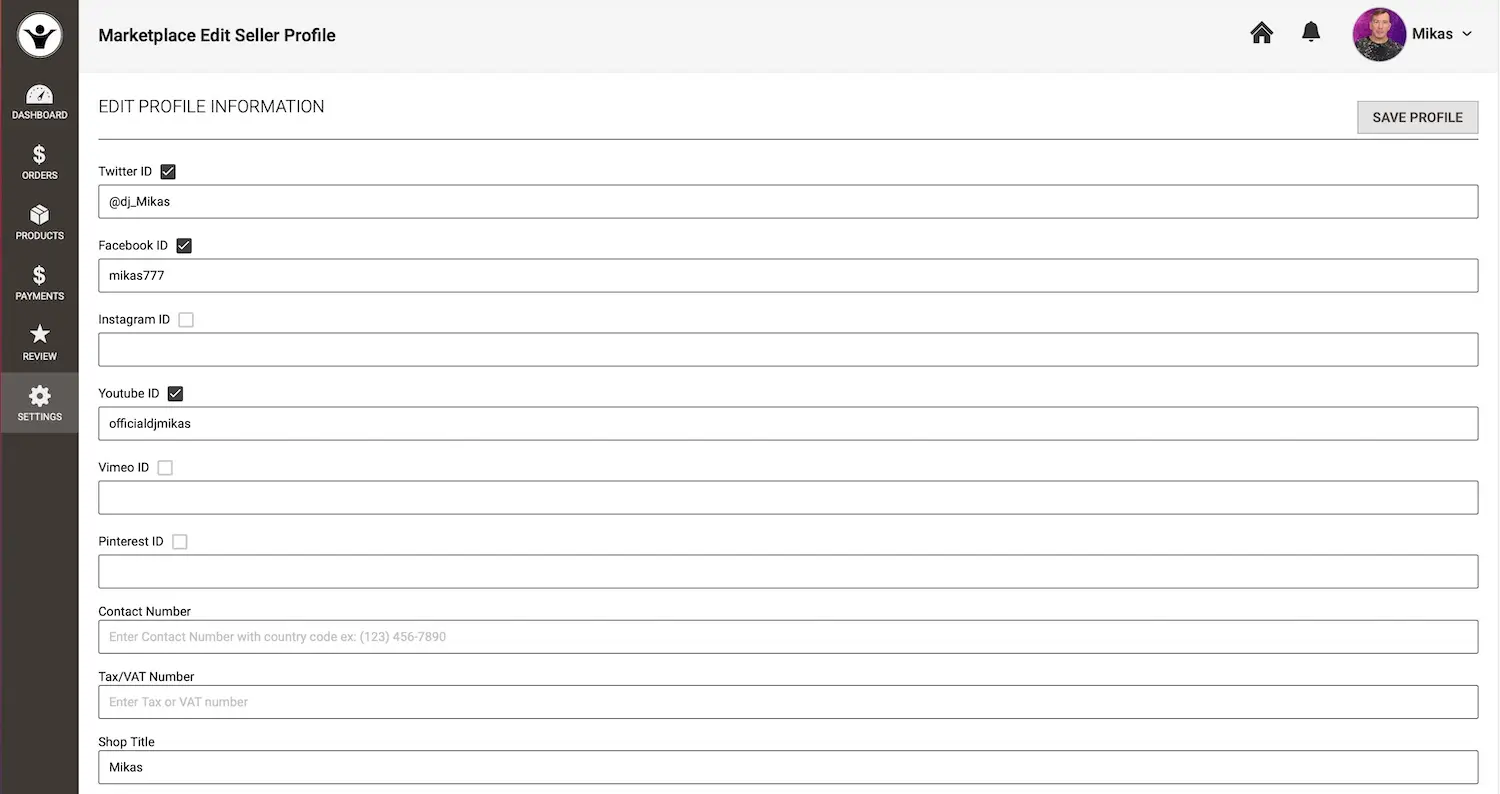
Settings Page
- Purpose: Customize your seller profile and configure payment details.
- Recommendation: Fill out as much information as possible to enhance your visibility and credibility.
Key Settings
- Social Networks
- Add links to your social media profiles to display on your seller page.
-
- Shop Title
- The name shown on every product page and across the site. Choose carefully—it’s your brand!
-
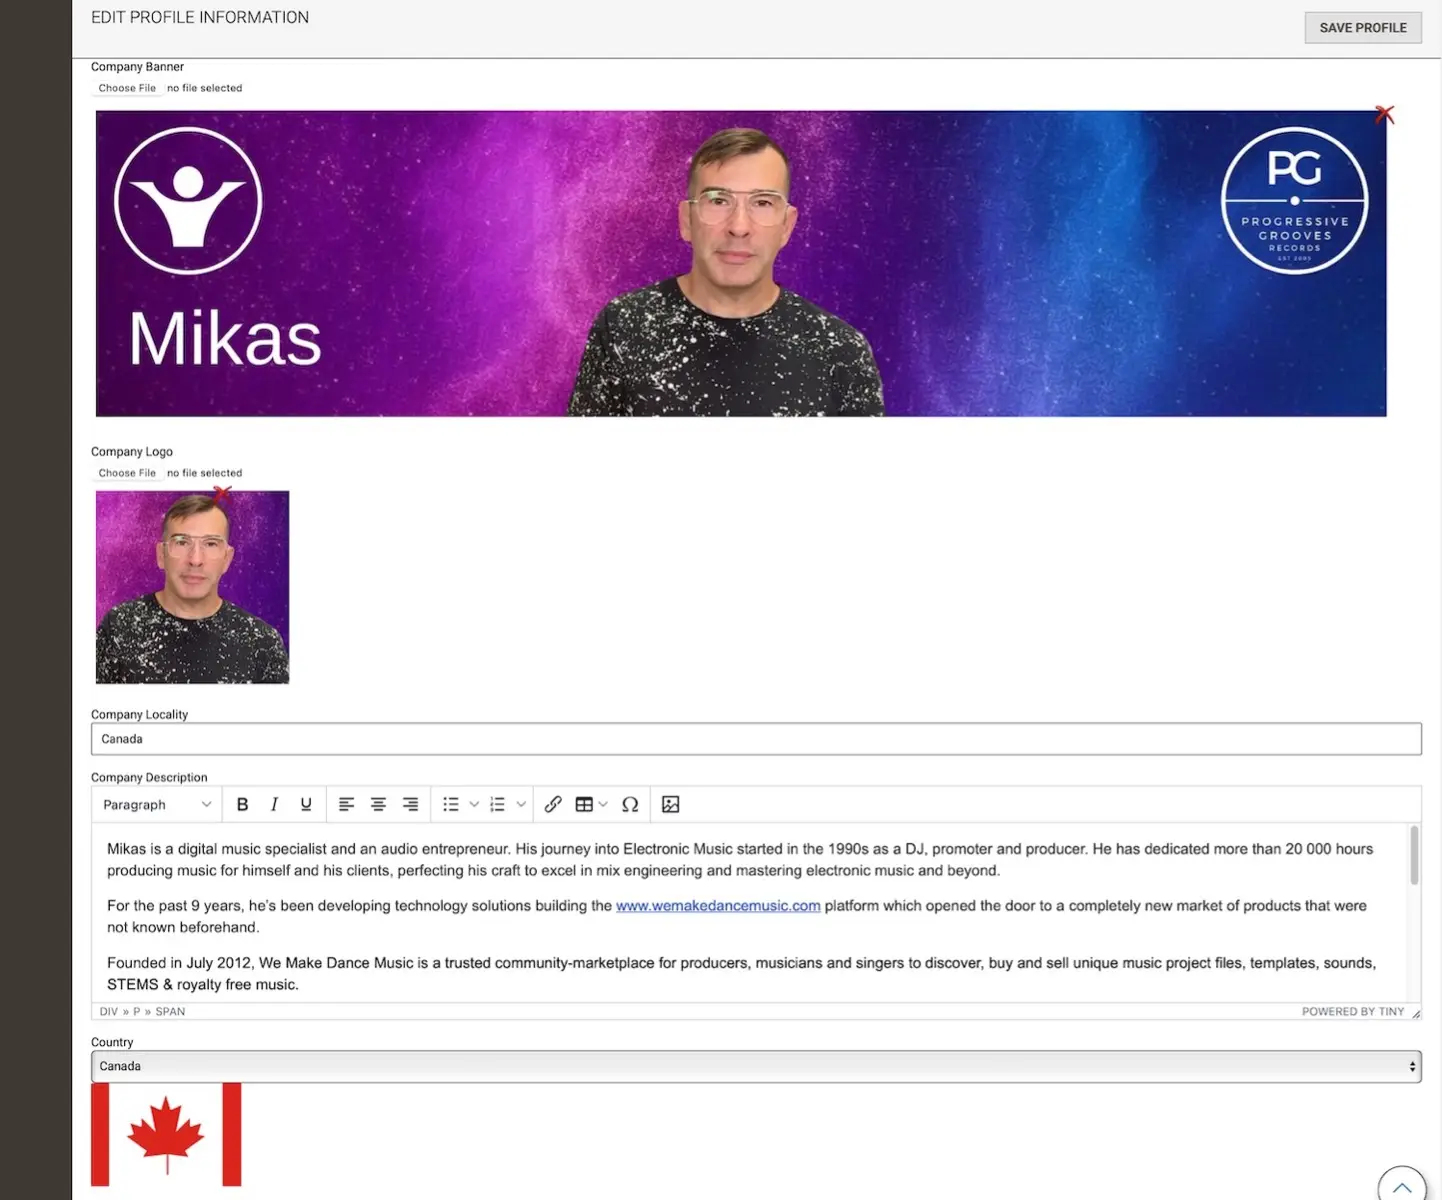
- Company Banner
- Upload a JPG image sized2000x475 pixels featuring your brand.
-
- Company Logo
- Upload asquare image of your logo (or a personal picture if you’re an artist).
-
- Company Locality
- Enter thecity where you’re based.
-
- Company Description (or Bio)
- Write a detailed description, including highlights.
- Feel free to promote your website or catalog here.
-
- Meta Keywords and Description
- Optimize your profile for search engines.
-
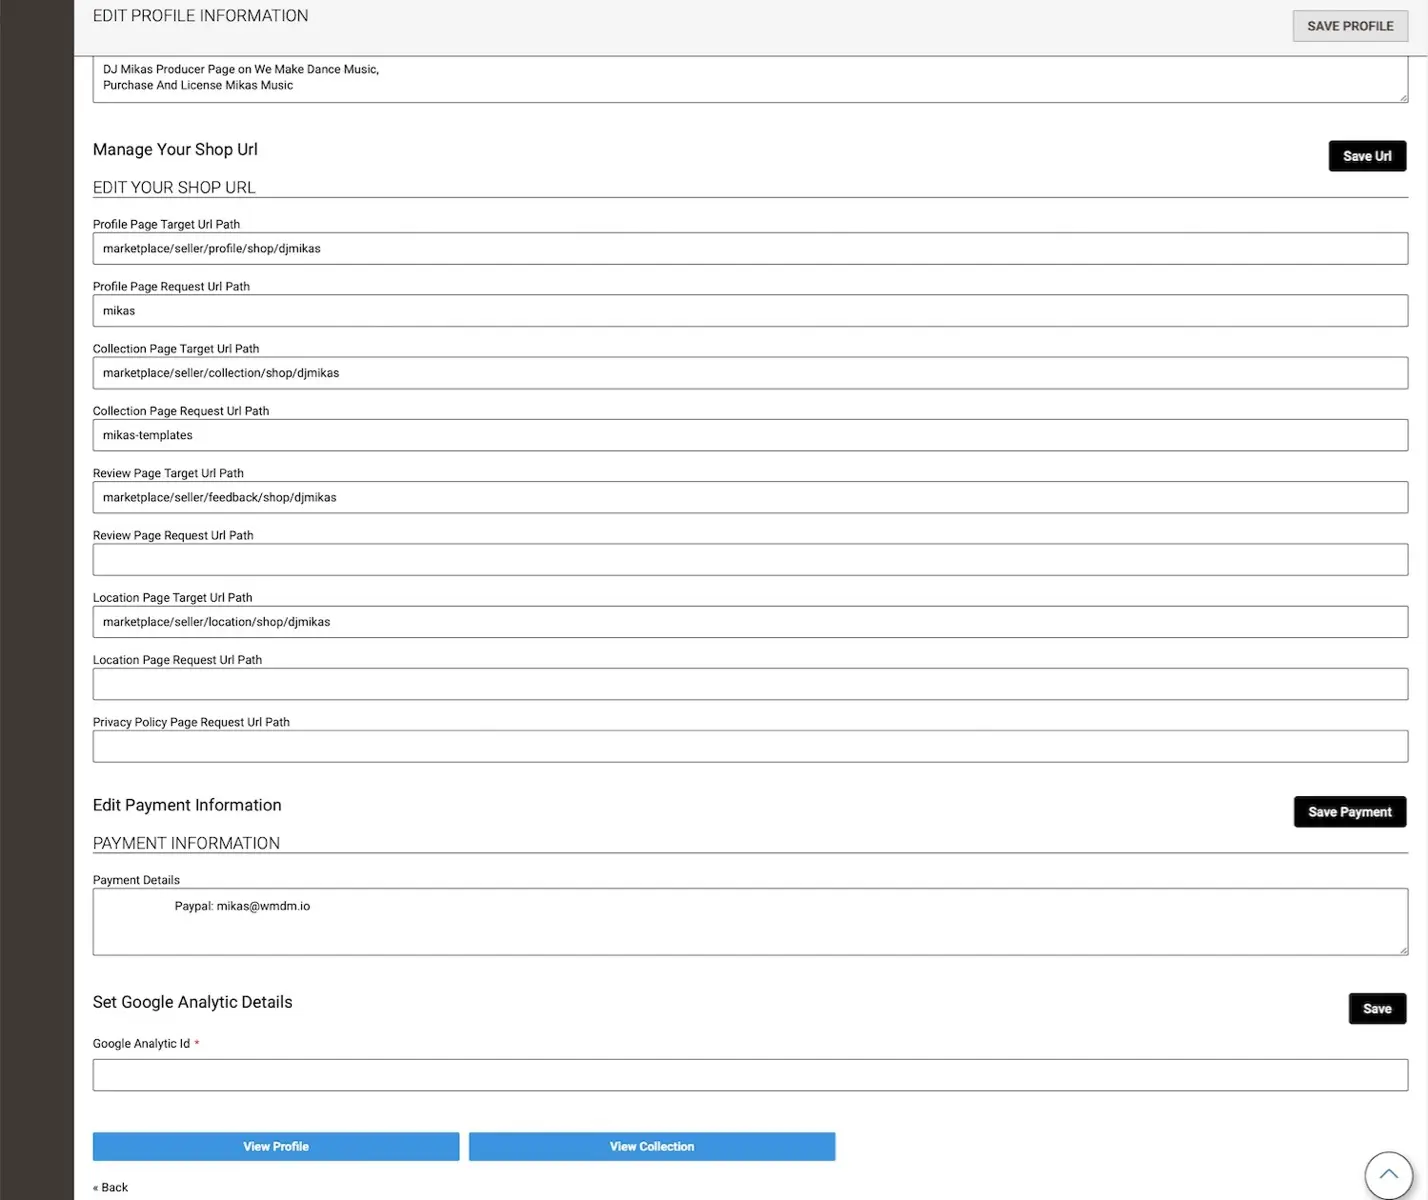
- Manage Your Shop URL
- Edit this only if you fully understand the implications (e.g., how it affects links).
-
- Profile Page URLs
- Target URL Path: The default URL to your profile.
- Request URL Path: Create a custom URL (e.g., enter "myloop" for "ourshop.com/myloop").
- Other URL options work similarly for additional pages.
-
Payment Information
- Refer to the "Getting Paid" page at/news/getting-paid-2 for instructions on setting up payments.
Google Analytics
- Add yourGoogle Analytics code to track traffic to your pages and profile.
Final Tips
- Use the dashboard regularly to stay updated on sales and product performance.
- Keep your profile detailed and professional to attract more buyers.
- Always save changes when editing products or settings.


Validate your login